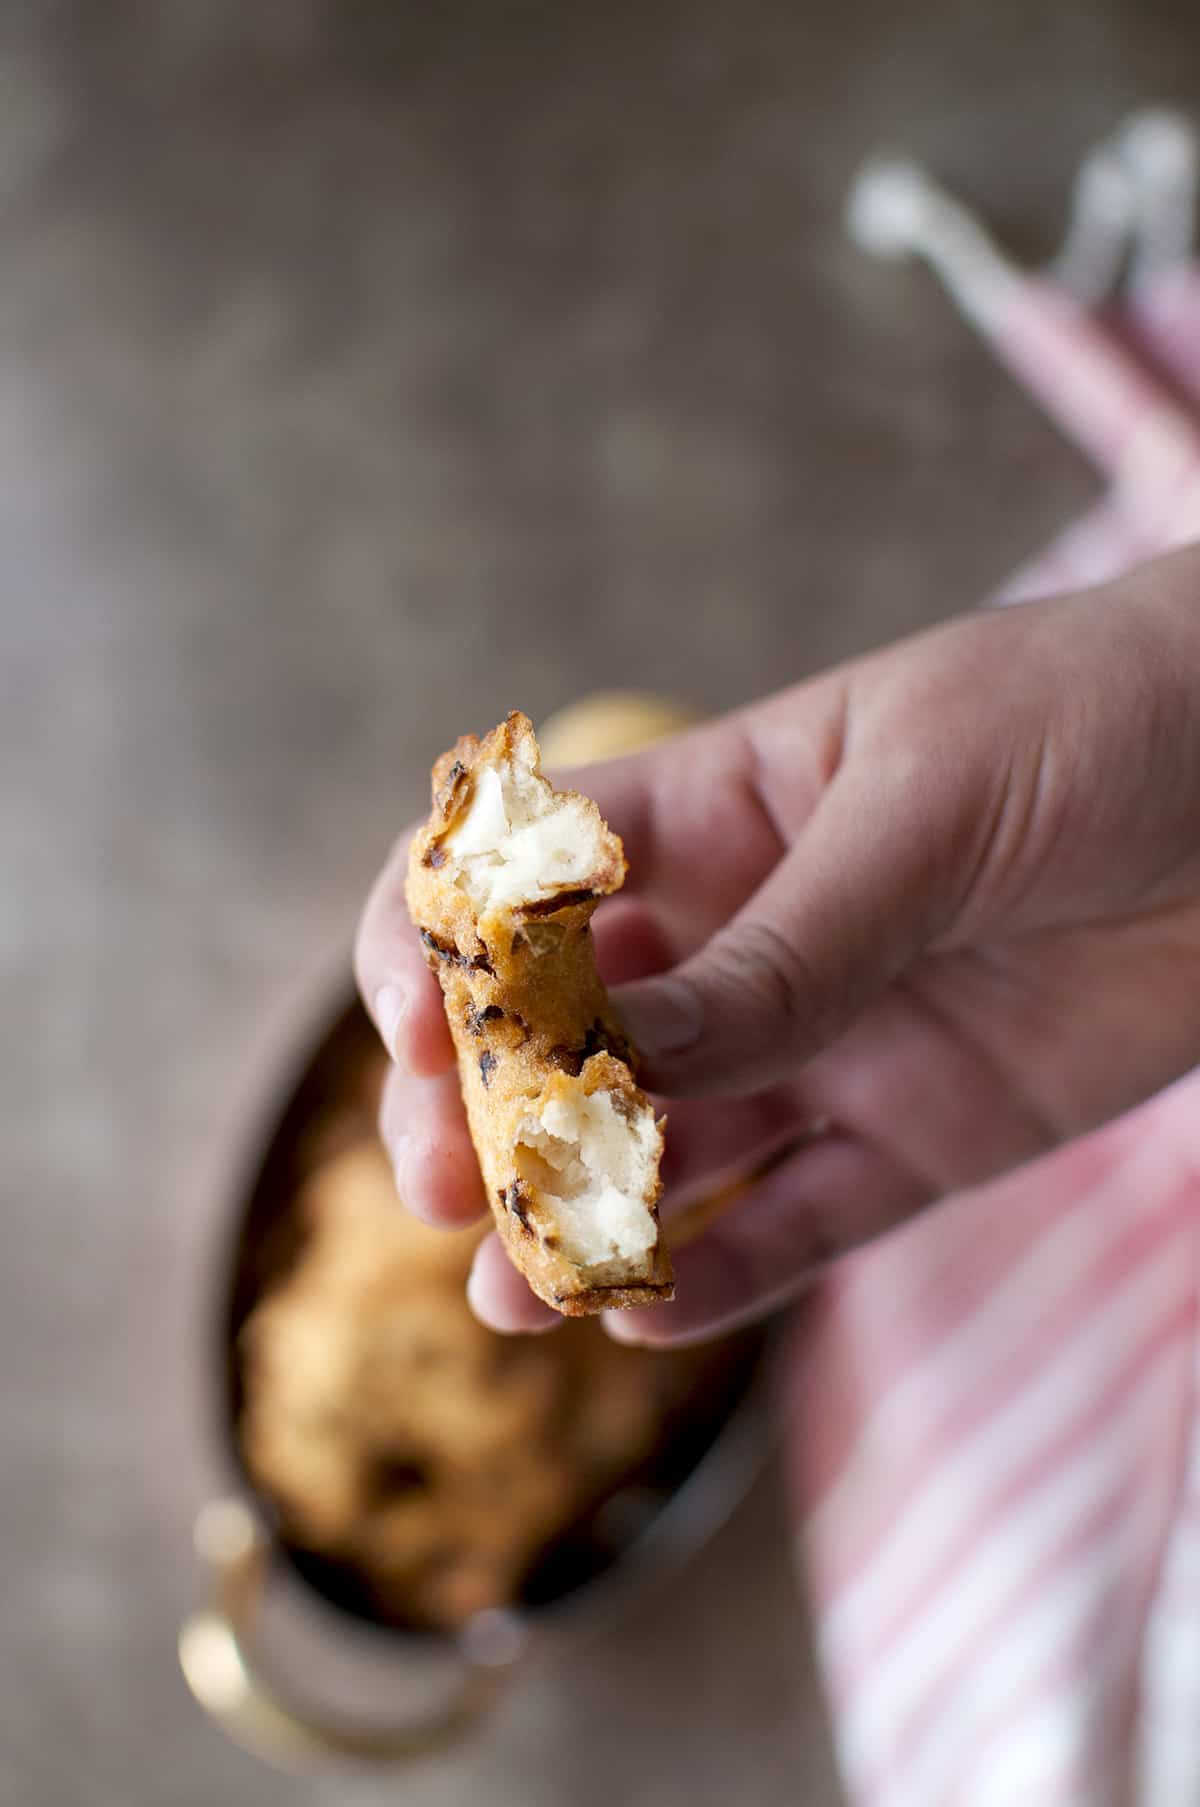
Minapa Vada is a quintessential South Indian lentil based snack that is crispy, airy and absolutely delicious. It can be served for breakfast or snack. Also it is made widely during the festival season.
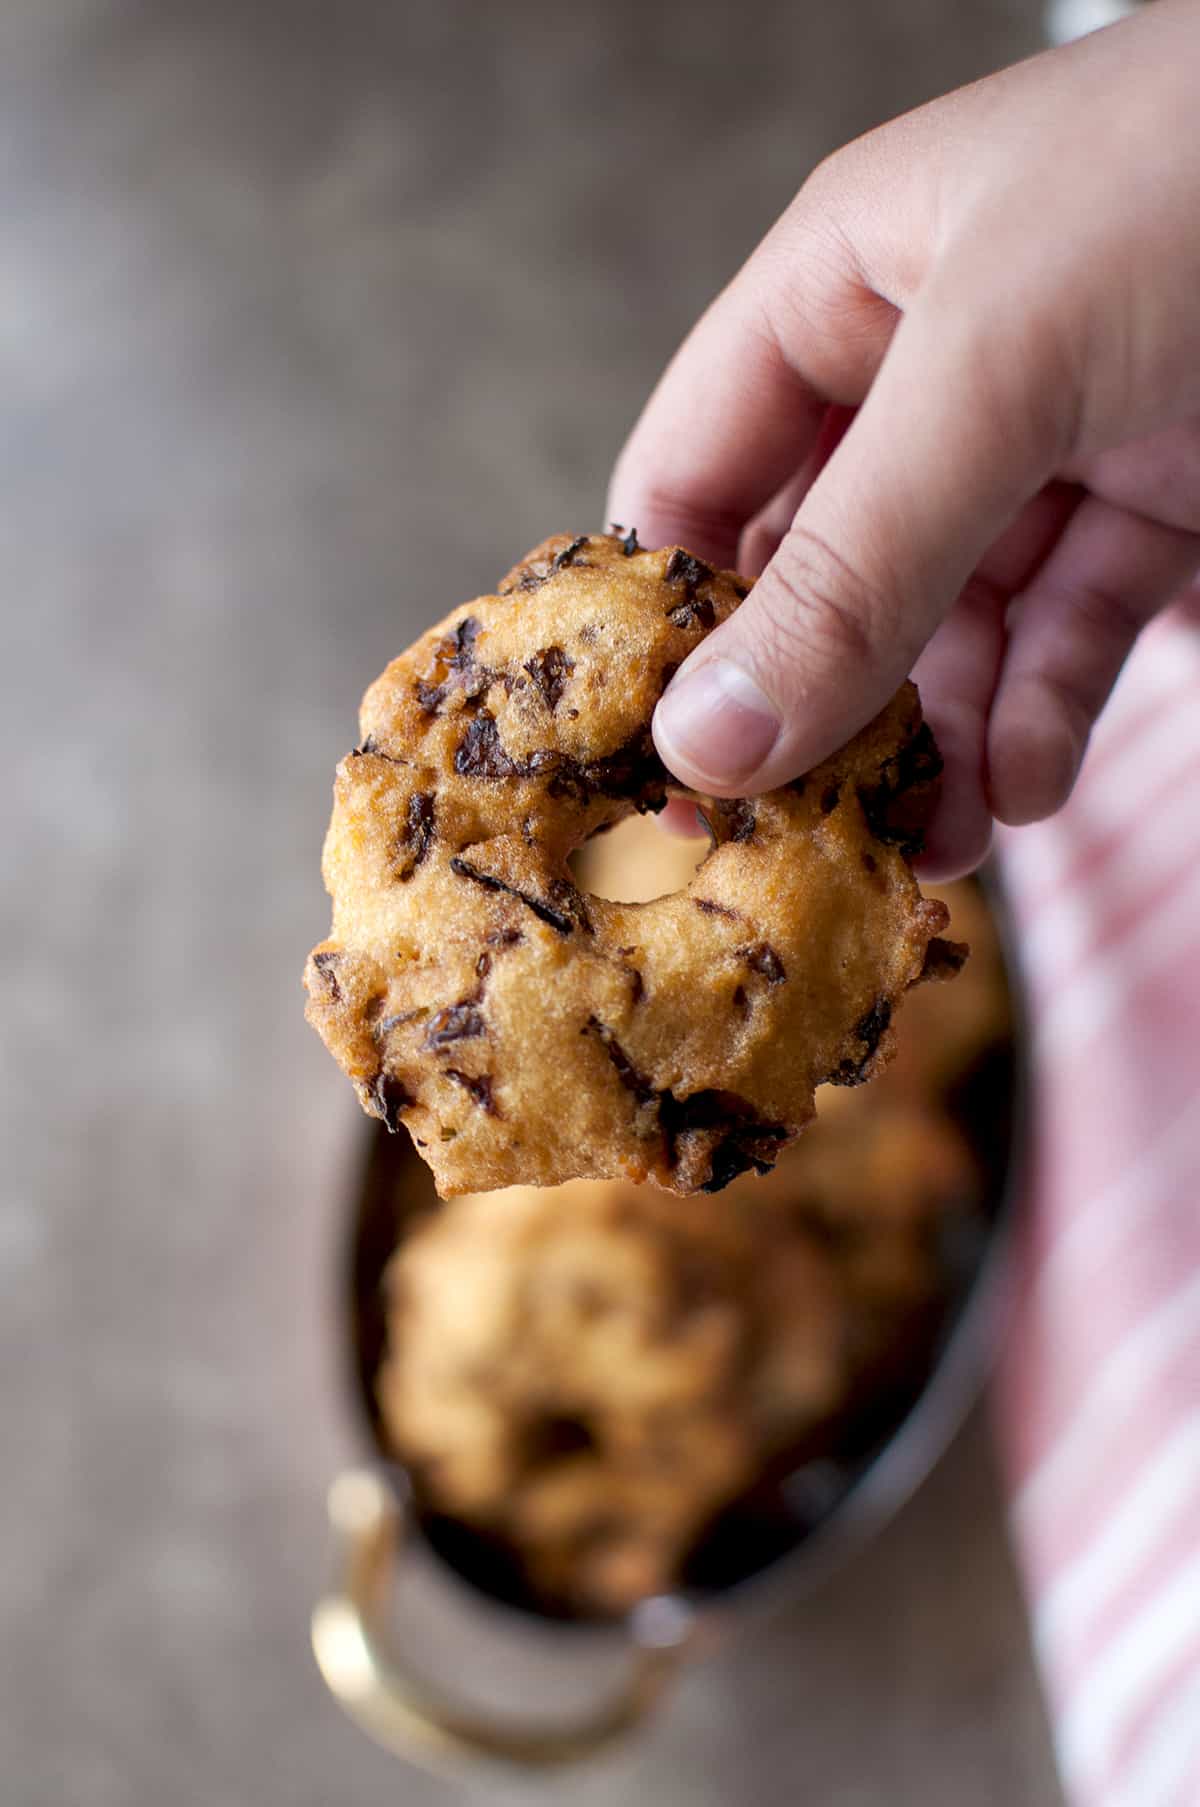
Who doesn't like crispy on the outside, airy and fluffy vada. My kids love them and call them savory Indian donuts. They definitely resemble western doughnuts with their round shape and hole in the middle. But the similarities end right there.
Minapa vada or garelu in Telugu, uzhunnu vada in Kannada are made with urad dal. They are savory in taste and can be made both plain or with veggies.
Medu vadai is probably the simplest of all. Flavored with cumin seeds, crushed peppercorns (sometimes), green chilies and cilantro (or curry leaves).
Sometimes veggies like cabbage and onion are added to the basic recipe to jazz them up. My favorite is the one with onion. These are called ullipaya garelu in Telugu and they are super tasty.
But, while making for festivals, use of onion is restricted. So, instead we can make them with cabbage for dasara and diwali.
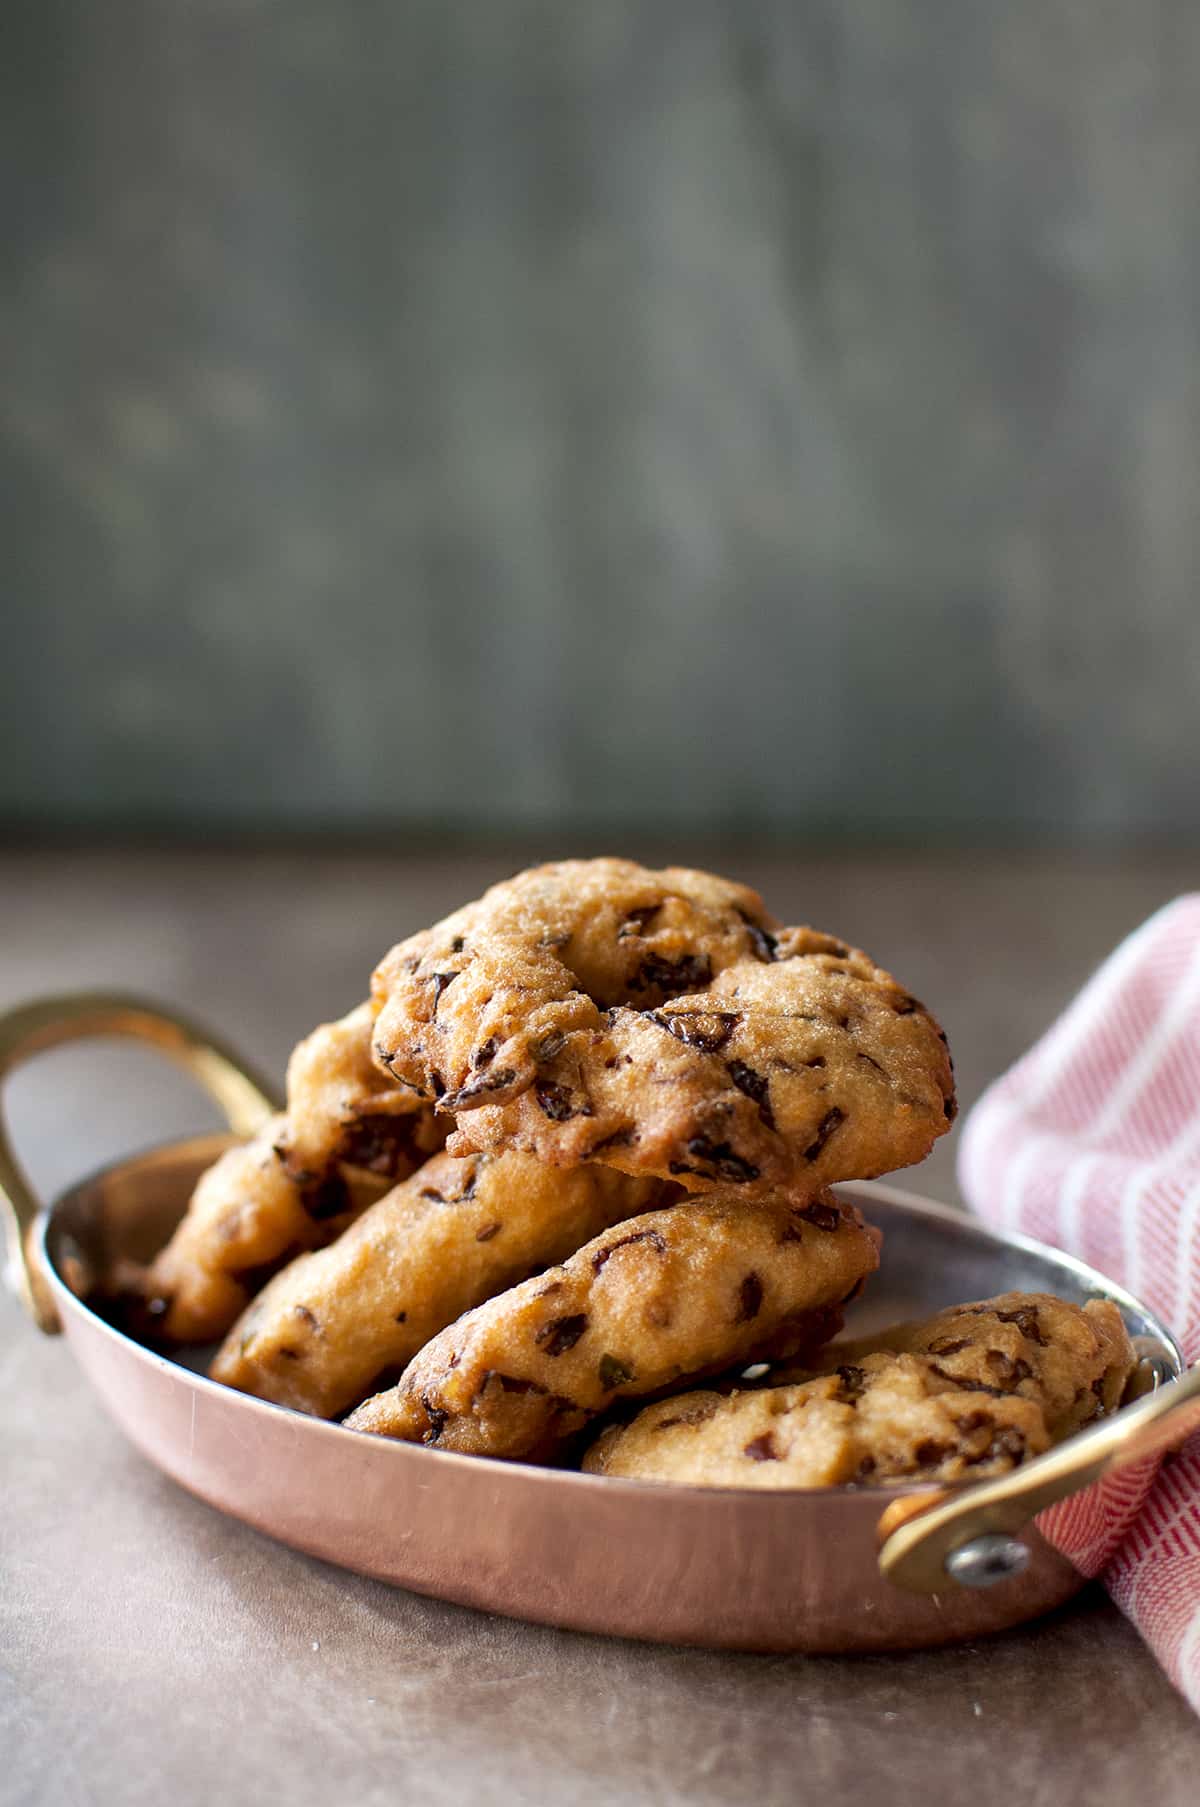
This Andhra style vada recipe is quite easy to make. All you need is handful of ingredients and a little bit of time (to soak) and patience. You will be rewarded with crispy delicious chillu garelu in no time.
I have included tips and tricks to make delicious minapa vada. You will need a bit of practice to master the skill of making these round and perfect. But even if they are misshapen, they will still taste great.
Ingredients
Here's what you need to make these chillu garelu (literally translates with vada with hole in Telugu):
Urad Dal (minapappu) - traditionally whole, skinned dal. But I have found split, skinned urad dal to work better.
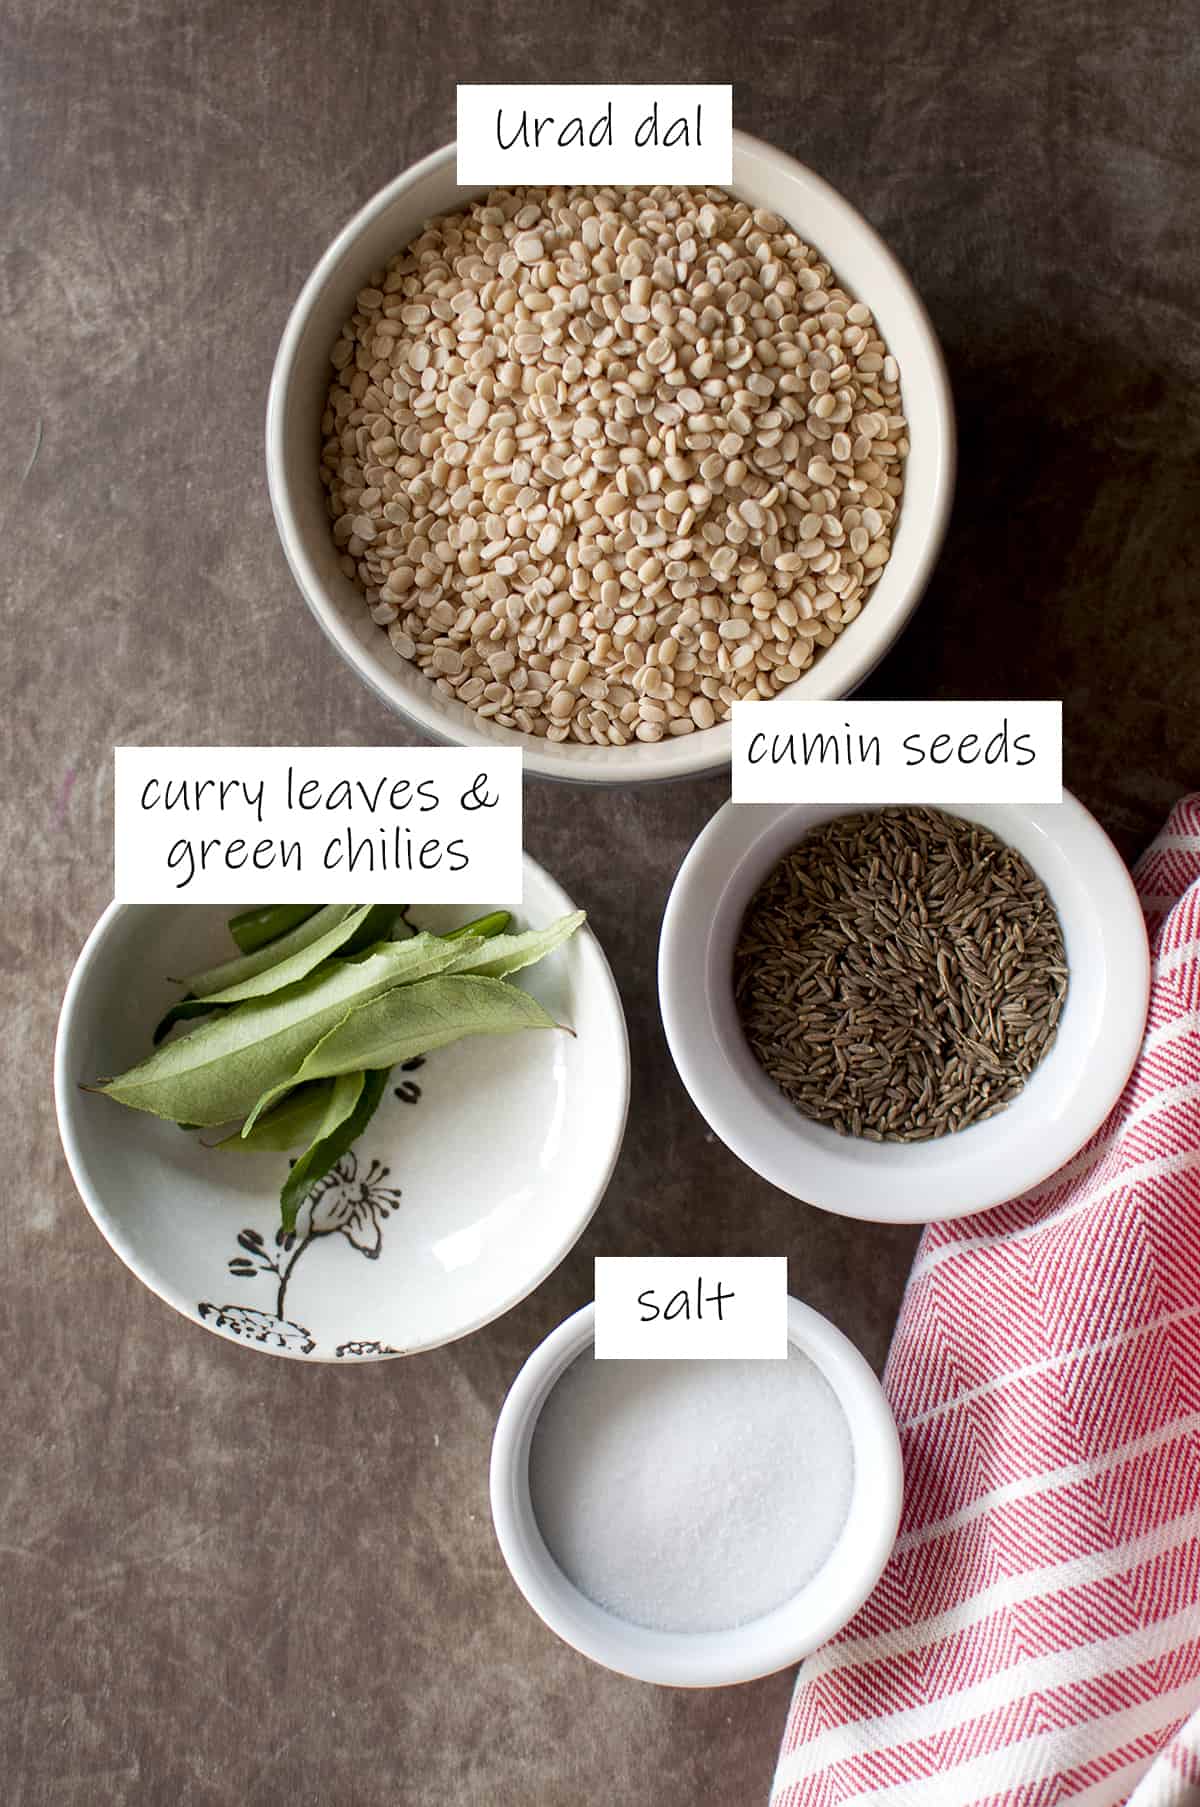
Basic flavoring ingredients - cumin seeds, green chilies, curry leaves and salt
Optional Ingredients - Onion, cabbage, ginger, crushed peppercorns, cilantro. Pick 1~2 of these to jazz up your garelu.
Instructions
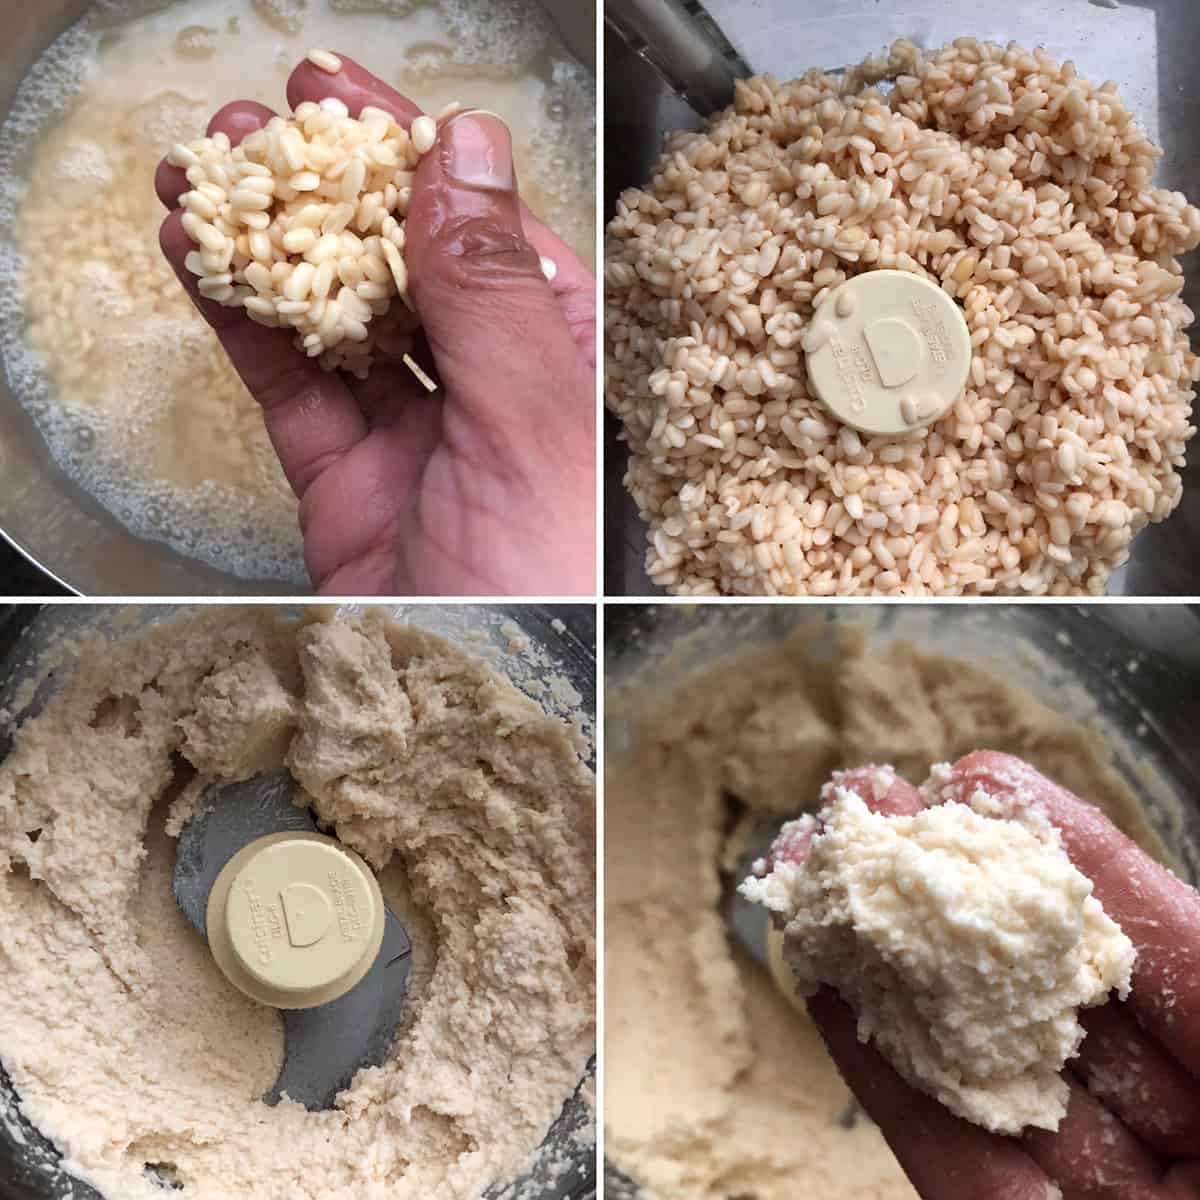
Soaking: Start by soaking the urad dal for at least 4~6 hours or overnight. Dal will expand a little bit after soaking. You want to make sure that the lentils are well soaked.
Grinding: Drain the soaked dal and grind with very little water into a smooth paste. Add water, add 1 tablespoon at a time. Batter should hold its shape when held in your hand.
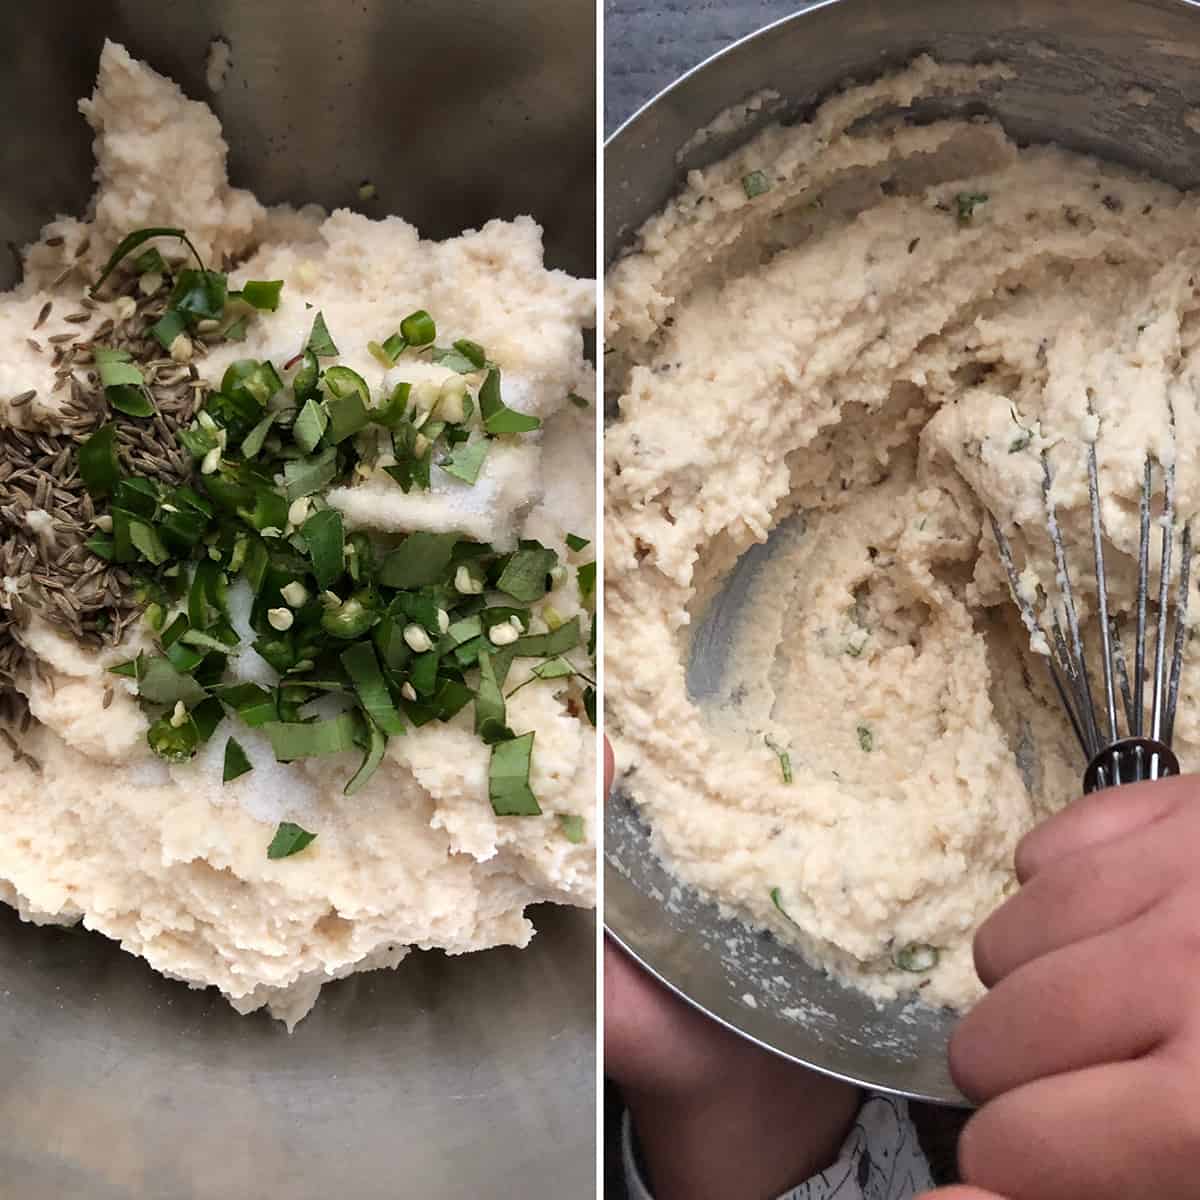
Add cumin seeds, chopped green chilies, curry leaves, salt and cabbage (if using). Mix well.
Whisk the batter for about 5~7 minutes to add air into it. This step helps in making fluffy vada instead of dense ones.
Heat oil for frying in a small wok on medium~medium-high heat.To make vada, place a bowl of water and wet both your hands. Take about ¼ cup of batter and place it on your palm. Flatten it lightly and poke a hole in the middle with your finger.
You can also use a ziploc bag or aluminum foil to make vada. Moisten it with water, place the batter on it, flatten it and poke a hole in the middle.
Slowly transfer the vada into the hot oil and fry until golden brown and cooked through, about 3 minutes per side. Depending on the size of your pan, you can make 3~4 vada at a time.
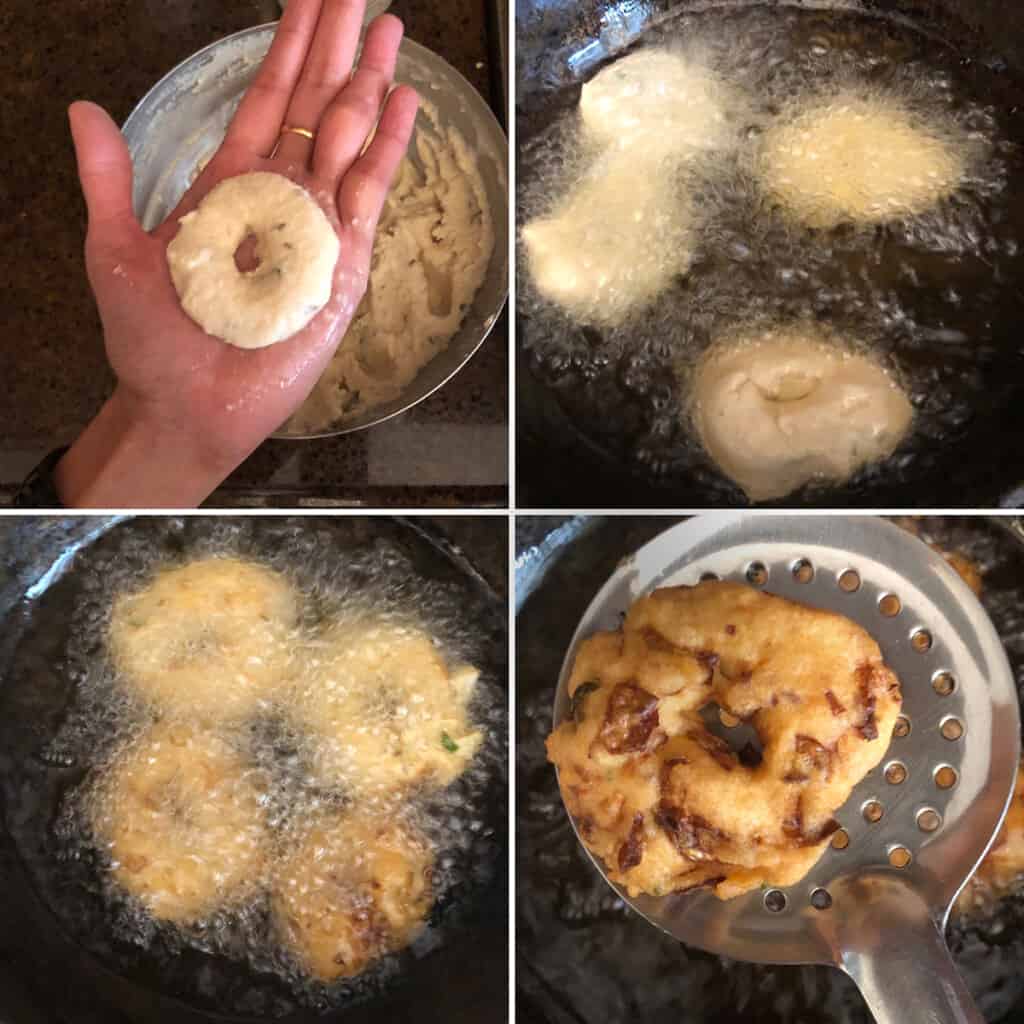
Carefully remove them from the oil using a slotted spoon. Place them on a paper towel lined plate and repeat with the remaining batter.
Serve immediately with allam pachadi or sambar or coconut chutney or just as is.
Expert Tips
There are a few key points to keep in mind while making minapa vada:
- Consistency of the batter:
- If the batter is too thick then the vada will turn out hard and if it is too thin then they won't hold their 'vada' shape.
- Traditionally a stone grinder (like an Ultra grind) is used. The way batter is ground in this grinder adds air and makes for much softer and fluffier vada.
- But if you don't have one of those gadgets, a food processor is a great alternative. So, instead of using a blender, pull out your food processor for this recipe.
- Adding air into the batter:
- Whisking the ground batter to incorporate air is an important step in making fluffy vada.
- Frying:
- It is important to make sure that the oil is HOT before adding the batter in.
- Preheat the oil on medium heat. To test if it is ready, add a tiny amount of batter to the hot oil and if it sizzles and comes to the surface - you are ready to go. If the batter sinks to the bottom, then let the oil heat for a few more minutes.
- Also make sure that the oil is at a steady temperature. So you might have to adjust it accordingly while cooking.
- Just make sure that the oil is not too hot which will burn the vada. And if too cold, then the vada will not turn crispy.
Few more tips
- Use whole, urad dal with skin to make pottu minapappu garelu. Soak the lentils for 6~8 hours or overnight. Drain and add fresh water to the bowl. Then using your fingers, rub the skin off of the lentils. You don't have to remove ALL of the skin but try to get at least 60~70% off. Then grind and proceed with the recipe.
- Vada batter can be made upto 6~8 hours (and up to overnight) ahead of time. Do not add the add-ins at this point. Refrigerate until ready to use. Remove the batter about 30~40 minutes before frying and follow the recipe as is.
- If you add too much water by mistake while grinding, then add a few tablespoons of rice flour to thicken it up.
- They are best eaten the day they are made. But leftovers can be stored at room temperature in an airtight container. Warm in the microwave just before serving.
- Freezing is also an option. Store completely cooled vada in an ziploc bag and freeze for up to 2 months. To thaw, air fry or microwave them until hot - about 4~5 minutes.
Few more fried recipes to try

I love hearing from you!! If you’ve tried this and liked it, then don't forget to let me know. Give a star rating and let me know in the comments below. Also tag me in your creations on Instagram @cooks_hideout. I love sharing photos when people make my recipes. You can use the hashtag #cookshideout too.

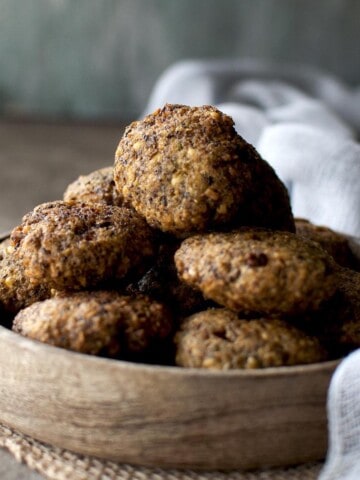
Minapa Vada | Cabbage Vada
Ingredients
- 1 cup Urad dal
- 1 tsp Cumin seeds
- 2~3 Green Chilies, finely chopped
- 6~8 Curry leaves, finely chopped
- 1 cup Finely Chopped Cabbage or Onion (optional)
- To taste Salt
- As needed Oil, for deep frying
Instructions
- In a medium size mixing bowl, soak urad dal in plenty of water for 4~6 hours or overnight.
- Drain dal and grind the soaked dal with little water into a smooth paste. Add water 1 tablespoon at a time. Batter should hold its shape when held in your hand.
- Add cumin seeds, chopped green chilies, curry leaves, salt and cabbage (if using). Mix well.
- Whisk the batter for about 5~7 minutes to add air into it. This step helps in making fluffy vada instead of dense ones.
- Heat oil for frying in a small wok on medium~medium-high heat.
- To make vada, place a bowl of water and wet both your hands. Take about ¼ cup of batter and place it on your palm. Flatten it lightly and poke a hole in the middle with your finger.
- You can also use a ziploc bag or aluminum foil to make vada. Moisten it with water, place the batter on it, flatten it and poke a hole in the middle.
- Slowly transfer the vada into the hot oil and fry until golden brown and cooked through, about 3 minutes per side. Depending on the size of your pan, you can make 3~4 vada at a time.
- Carefully remove them from the oil using a slotted spoon. Place them on a paper towel lined plate and repeat with the remaining batter.
- Serve immediately with ginger chutney or sambar or coconut chutney or anything else.
Notes
- Use whole, urad dal with skin to make pottu minapappu garelu. Soak the lentils for 6~8 hours or overnight. Drain and add fresh water to the bowl. Then using your fingers, rub the skin off of the lentils. You don't have to remove ALL of the skin but try to get at least 60~70% off. Then grind and proceed with the recipe.
- Vada batter can be made upto 6~8 hours (and up to overnight) ahead of time. Do not add the add-ins at this point. Refrigerate until ready to use. Remove the batter about 30~40 minutes before frying and follow the recipe as is.
- If you add too much water by mistake while grinding, then add a few tablespoons of rice flour to thicken it up.
- Make sure that the oil for frying is on medium heat.
- They are best eaten the day they are made. But leftovers can be stored at room temperature in an airtight container. Warm in the microwave just before serving.
- Freezing is also an option. Store completely cooled vada in an ziploc bag and freeze for up to 2 months. To thaw, air fry or microwave them until hot - about 4~5 minutes.
Nalini's Kitchen
Nice and crispy vadas,your picture makes me tempting...
Priya Suresh
Who can resist to this addictive vadas, love that u prepared urs with cumin, i love cumins in vadas.
Srividhya Gopalakrishnan
My all time favorite 🙂
Srivalli
Garelu have turned out so good...this is a must for all festivals right..
Suma Gandlur
Addictive ones. For us, pottu minapa garelu is mandatory for all functions, big or small.
Global Tastes & Travels Inc.
Welcome back. garelu look so light and fluffy despite being fried
Global Tastes & Travels Inc.
Welcome back. garelu look so light and fluffy despite being fried
Varadas Kitchen
I love these Vadas. Have to make these soon! They look so yummy!
Harini-Jaya Rupanagudi
Welcome back, Pavani. Hope you had a fun filled vacation! Fantastic and traditional treats!
sneha datar
A yummy and prefect vadas.
PJ
They have turned out so well! Irresistible snack!